
 Internet has grown as rapidly in last two decades. A number of resources on internet remain uncensored, uncontrolled because there is no central authority and method to monitor everything.
There are “bad guys” across globe who plant malicious software, misleading ads on internet. Now, with internet ready handheld devices and smart TVs people use a number of apps which have transformed them how they do shopping, browsing, watch movies, play games, do online banking transactions and so on. But did you ever thought among these thousands of internet resources accessed on home devices some links may steal your personal data or may download some Trojan software on devices.
Another big risk is smart phones given to kids at home. They download apps and games without thinking of security and content in apps. Many apps pop-up unwanted ads promoting more misleading applications and websites, and even download “bad” software.
To control such unwanted apps and URLs there are organizations and communities working hard to prepare and update list of such notorious web content domains/sites. To leverage these readily available block lists you need some active interface between devices and internet which can filter out unwanted traffic. There are many tools/systems in market for this. One such open source tool is pi-hole.
These days when applications and content has moved to internet clouds, blocking IP addresses in firewall may not help. For eg, an internet resource hosted on cloud or on multiple servers in world (using anycast) cannot be merely blocked by IP or even with set of IPs. The best way is to block that domain itself. This is where DNS helps.
You can build such system a using pi-hole, which mainly acts as DNS server and gets feed of suspected domains from many community block lists.
In addition to per-polulated block list you can build your own blacklist in pi-hole. If you think some domain is unnecessarily block then you can explicitly add it in “White list” of pi-hole.
Installing pi-hole is simple, on your Linux machine just type
curl -sSL https://install.pi-hole.net | bash
I have a dedicated raspberry pi 3 for pi-hole to control what my home devices can access.
While installation it will prompt you to select one of the public DNS, such as google, cloudflare, opendns etc. You can also assign DNS IP of your ISP in “custom” settings. Also make sure you enable pi-hole web interface while following installation steps. Once installed, it will show you “Admin” link and random password to manage pi-hole through web. Default admin installation goes on http://your_ip/admin/
Next, you have to advertise pi-hole server as DNS resolver to your devices. To do this steps may vary from router to router. I had flashed my TP-Link Archer C20 with openwrt, So lets see how to advertise pi-hole IP using DHCP.
In my case pi-hole IP is 192.168.0.23 and my router IP is 192.168.0.1. By default 192.168.0.1 is the DNS IP published by DHCP (of router) to the clients in my network. To change DNS IP published by DHCP, edit /etc/config/dhcp on router and add list dhcp_option "6,192.168.0.23" in “lan” section like:
config dhcp 'lan'

option interface 'lan'

option dhcpv6 'server'

option ra 'server'

option ra_management '1'

option start '100'

option limit '255'

option leasetime '24h'

list dhcp_option "6,192.168.0.23"
Read http://www.networksorcery.com/enp/protocol/bootp/options.htm to understand dhcp_option section.
Once done, restart dnsmasq on router to enforce updated config. Your devices may still be having old DNS from previous DHCP lease. To get new DNS IP on them you have to either wait till DHCP lease expires or manually renew lease from your devices or just reset all leases on directly on router.
/etc/init.d/dnsmasq restart
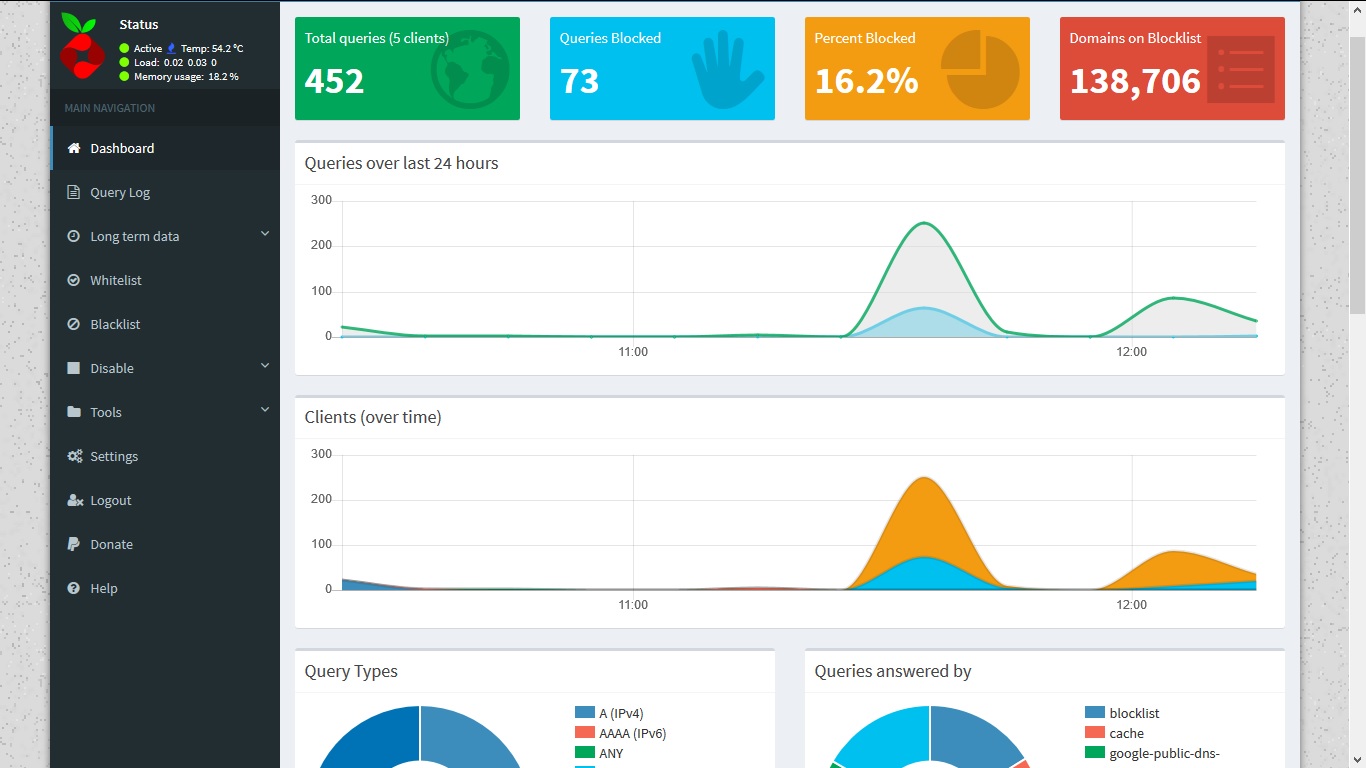
After this, what ever site or app you access will be parsed, resolved and logged on to pi-hole. You can find this in “Query log” section of pi-hole web interface.
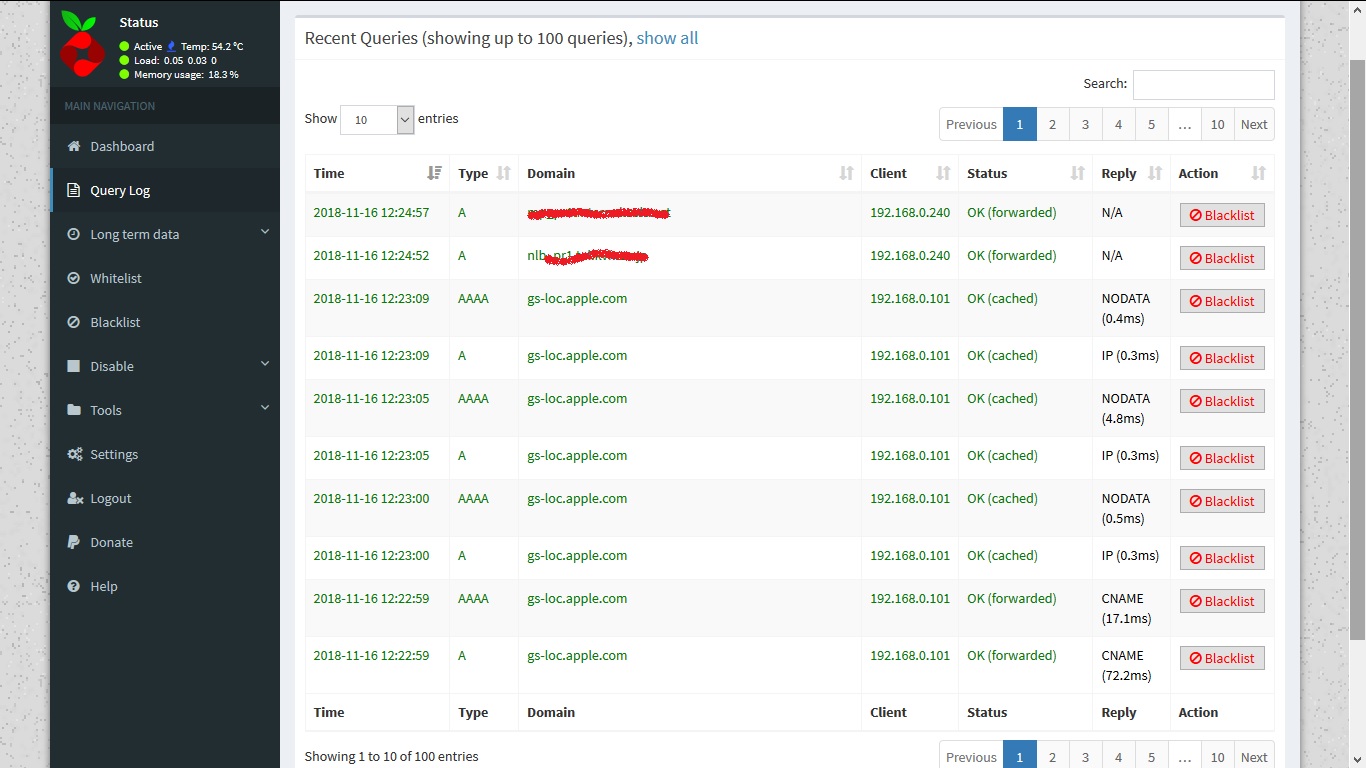
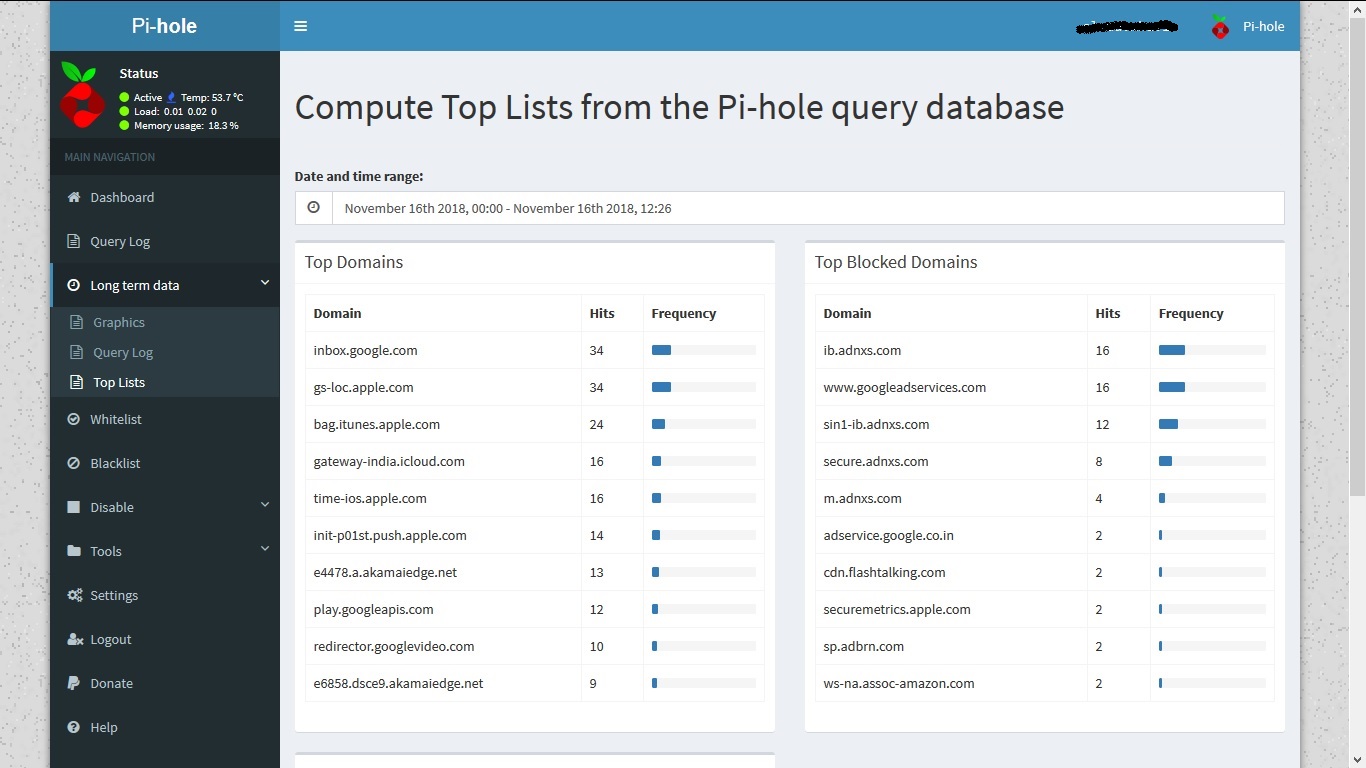
Query log gives short term data. To get long term data in raw format or graphs you can explore “Long term data” menu option.
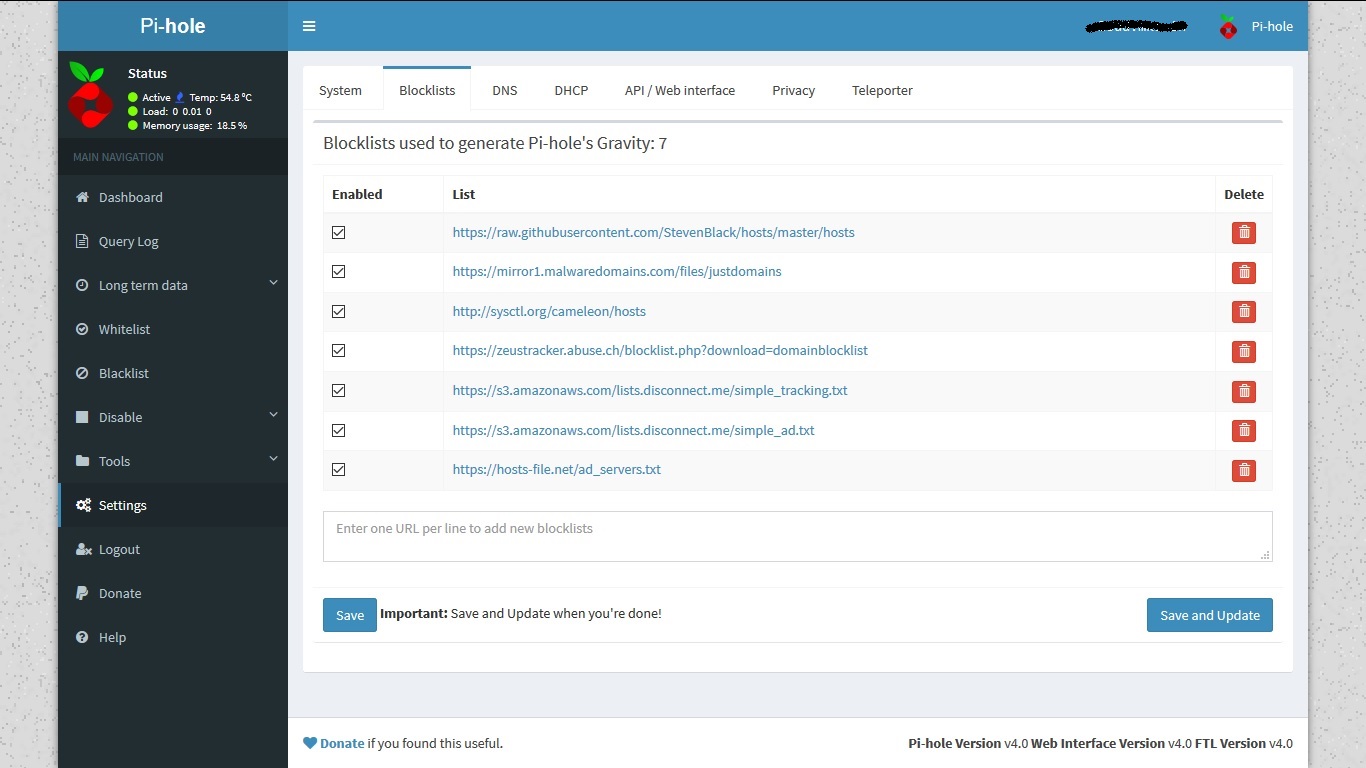
You can manage block lists in settings->Blocklists to add a new block list which you are aware of.
You can also blacklist/whilelist domains directly in pi-hole like:
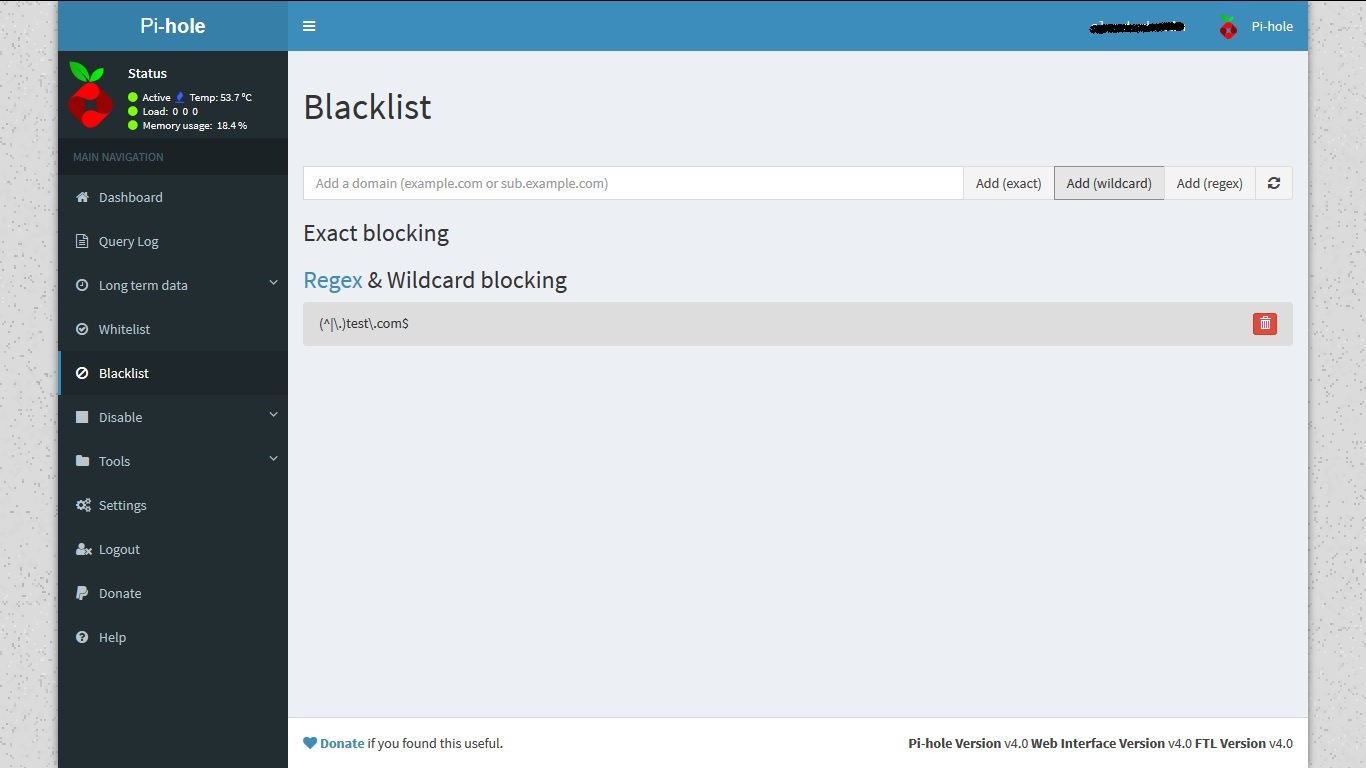
In case new updates in blacklist and whitelists don’t work, chances are domain is getting resolved from pi-home DNS cache or OS cache or browser cache.
In this case try to flush at least pi-hole cache by running following command
pihole restartdns
You should also update blocklist using cron job, Following cronjob will update it daily at 23:00 hrs.
23 0 * * * /usr/local/bin/pihole -g
You can edit pi-hole configuration from backend if needed to update your DNS IPs etc in /etc/pihole/setupVars.conf
PIHOLE_INTERFACE=eth0

IPV4_ADDRESS=xx.xx.xx.xx

IPV6_ADDRESS=xx.xx.xx.xx.xx.xx.xx.xx

PIHOLE_DNS_1=x.x.x.x

PIHOLE_DNS_2=x.x.x.x

QUERY_LOGGING=true

INSTALL_WEB_SERVER=true

INSTALL_WEB_INTERFACE=true

LIGHTTPD_ENABLED=true

WEBPASSWORD=xxxxxxxxxxxxxxxxxxxxxxxxxx
You can also configure items from pihole command line:
pihole -h

Usage: pihole [options]

Example: 'pihole -w -h'

Add '-h' after specific commands for more information on usage
Whitelist/Blacklist Options:

-w, whitelist       Whitelist domain(s)

-b, blacklist       Blacklist domain(s)

--wild, wildcard     Wildcard blacklist domain(s)

--regex, regex       Regex blacklist domains(s)

Add '-h' for more info on whitelist/blacklist usage
Debugging Options:
-d, debug Start a debugging session
Add ‘-a’ to enable automated debugging
-f, flush Flush the Pi-hole log
-r, reconfigure Reconfigure or Repair Pi-hole subsystems
-t, tail View the live output of the Pi-hole log
Options:

-a, admin           Web interface options

Add '-h' for more info on Web Interface usage

-c, chronometer     Calculates stats and displays to an LCD

Add '-h' for more info on chronometer usage

-g, updateGravity   Update the list of ad-serving domains

-h, --help, help    Show this help dialog

-l, logging         Specify whether the Pi-hole log should be used

Add '-h' for more info on logging usage

-q, query           Query the adlists for a specified domain

Add '-h' for more info on query usage

-up, updatePihole   Update Pi-hole subsystems

Add '--check-only' to exit script before update is performed.

-v, version         Show installed versions of Pi-hole, Web Interface & FTL

Add '-h' for more info on version usage

uninstall           Uninstall Pi-hole from your system

status              Display the running status of Pi-hole subsystems

enable              Enable Pi-hole subsystems

disable             Disable Pi-hole subsystems

Add '-h' for more info on disable usage

restartdns          Restart Pi-hole subsystems

checkout            Switch Pi-hole subsystems to a different Github branch

Add '-h' for more info on checkout usage
Stay safe !