
NodeMCU board is powered by ESP8266 WiFi unit which gives advantage of controlling circuits connected to NodeMCU over home WiFi or even internet.
Idea of connecting relay with NodeMCU will enable us to control 220AC appliances at home from anywhere in the world over internet.
Some basics first:
1) NodeMCU does provides 3.3V power and 3.3V signaling
2) The relay I have got is rated 5V, but such relays and other sensors do work on 3V to 5V range. So 3.3V power and signaling from NodeMCU should be able to control relay.
3) Relay has Normally open (NO) and Normally closed (NC) terminals on AC side. You should connect appliances on normally open terminal. Upon signalling from NodeMCU NO will short and appliance will turn on. Upon inverted signal from NodeMCU NO will again open and appliance will turn off.
Connections between NodeMCU and relay.
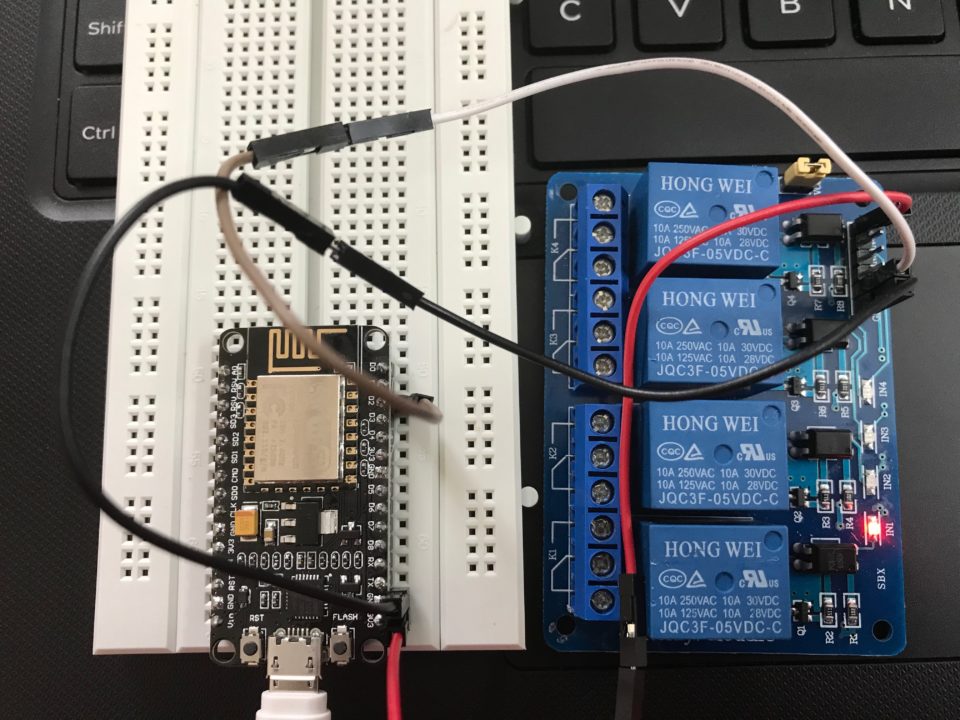
1) 3v3 (3.3V) on NodeMCU connects to VCC of relay board.
2) GND (Ground) on NodeMCU connects to GND on relay board.
3) D2 pin on NodeMCU connects to IN1 on relay board to operate first relay of 4 channel relay board.
Here is the quick code which turns on relay for 5 sec and then turns it off for 2 sec.
#define RELAY1 D2
void setup() {
pinMode(RELAY1, OUTPUT);
}
void loop() {
digitalWrite(RELAY1, HIGH);// turn off relay
delay(2000);            // wait for 2 seconds

digitalWrite(RELAY1, LOW); // turn on relay
delay(5000); // wait for 5 seconds
}
Next we will try to do relay singaling over MQTT network to instruct NodeMCU over WiFi and internet to turn on/off an appliance.